Adding Google Analytics 4 to your SharePoint Site
June 10, 2023
1 min
##Requirements
Before we start the following technology are installed in my development machine and its corresponding version
##Start
yo @microsoft/sharepoint
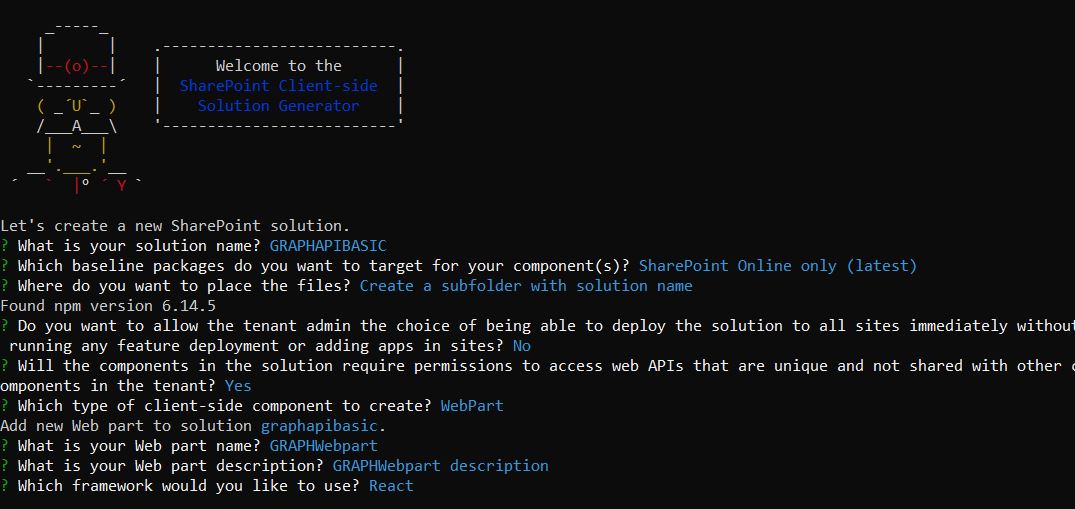
What is your solution name? GRAPHAPIBASIC
Which baseline packages do you want to target for your component(s)? SharePoint Online only (latest)
Where do you want to place the files? Create a subfolder with solution name
Do you want to allow the tenant admin the choice of being able to deploy the solution to all sites immediately without running any feature deployment or adding apps in sites? No
Will the components in the solution require permissions to access web APIs that are unique and not shared with other components in the tenant? Yes
Which type of clientside component to create? WebPart
What is your Web part name? GRAPHWebpart
What is your Web part description? GRAPHWebpart description
Which framework would you like to use? React
Try to open the “GRAPHAPIBASIC” folder in your Visual Studio Code
We will now install “microsoft-graph-types” in our solution.
npm install @microsoft/microsoft-graph-types --save-dev
Open “GraphWebpartWebPart.ts” (src\webparts\graphWebpart\GraphWebpartWebPart.ts) because we will be adding the following
import * as React from 'react';import * as ReactDom from 'react-dom';import { Version } from '@microsoft/sp-core-library';import {IPropertyPaneConfiguration,PropertyPaneTextField} from '@microsoft/sp-property-pane';import { BaseClientSideWebPart } from '@microsoft/sp-webpart-base';import * as strings from 'GraphWebpartWebPartStrings';import GraphWebpart from './components/GraphWebpart';import { IGraphWebpartProps } from './components/IGraphWebpartProps';import { WebPartContext } from '@microsoft/sp-webpart-base'; //export interface IGraphWebpartWebPartProps {description: string;context: WebPartContext; //}export default class GraphWebpartWebPart extends BaseClientSideWebPart<IGraphWebpartWebPartProps> {public render(): void {const element: React.ReactElement<IGraphWebpartProps> = React.createElement(GraphWebpart,{description: this.properties.description,context: this.context});ReactDom.render(element, this.domElement);}protected onDispose(): void {ReactDom.unmountComponentAtNode(this.domElement);}protected get dataVersion(): Version {return Version.parse('1.0');}protected getPropertyPaneConfiguration(): IPropertyPaneConfiguration {return {pages: [{header: {description: strings.PropertyPaneDescription},groups: [{groupName: strings.BasicGroupName,groupFields: [PropertyPaneTextField('description', {label: strings.DescriptionFieldLabel})]}]}]};}}
import { WebPartContext } from '@microsoft/sp-webpart-base' //export interface IGraphWebpartProps {description: string;context: WebPartContext;}
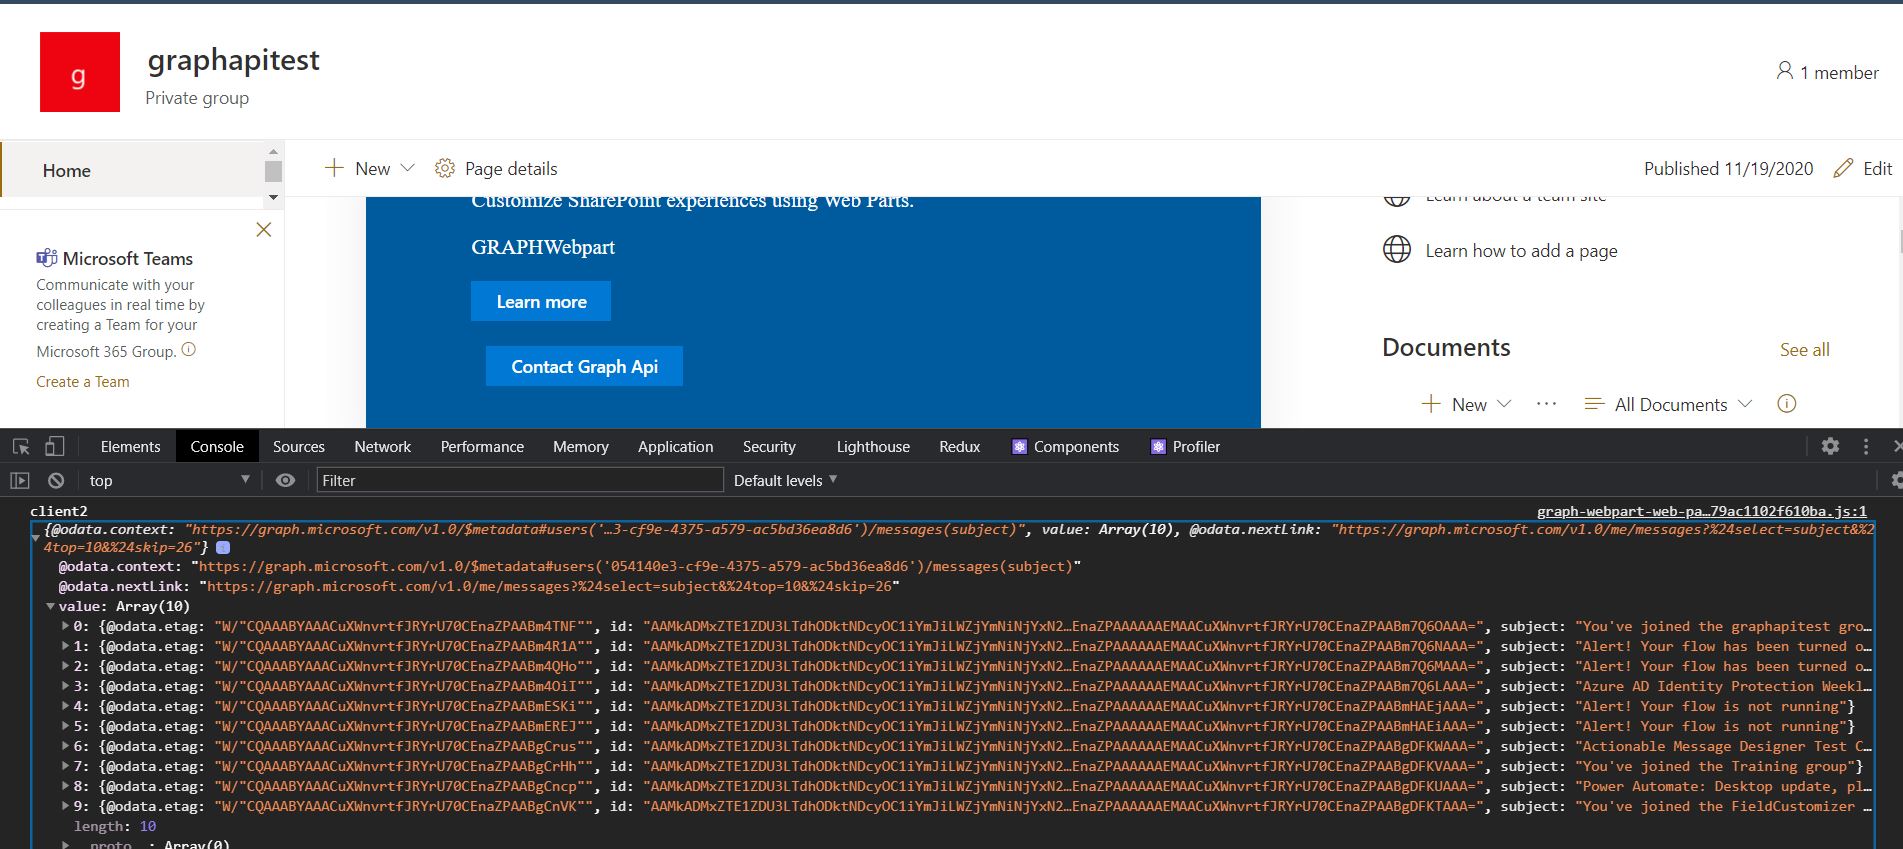
import { MSGraphClient } from '@microsoft/sp-http'import { WebPartContext } from '@microsoft/sp-webpart-base' //const AccessGraphApi = async (graphContext: WebPartContext): Promise<any> => {graphContext.msGraphClientFactory.getClient().then(async (client: MSGraphClient) => {const client2 = await client.api('/me/messages').select('subject').get()console.log('client2', client2)})}export { AccessGraphApi }
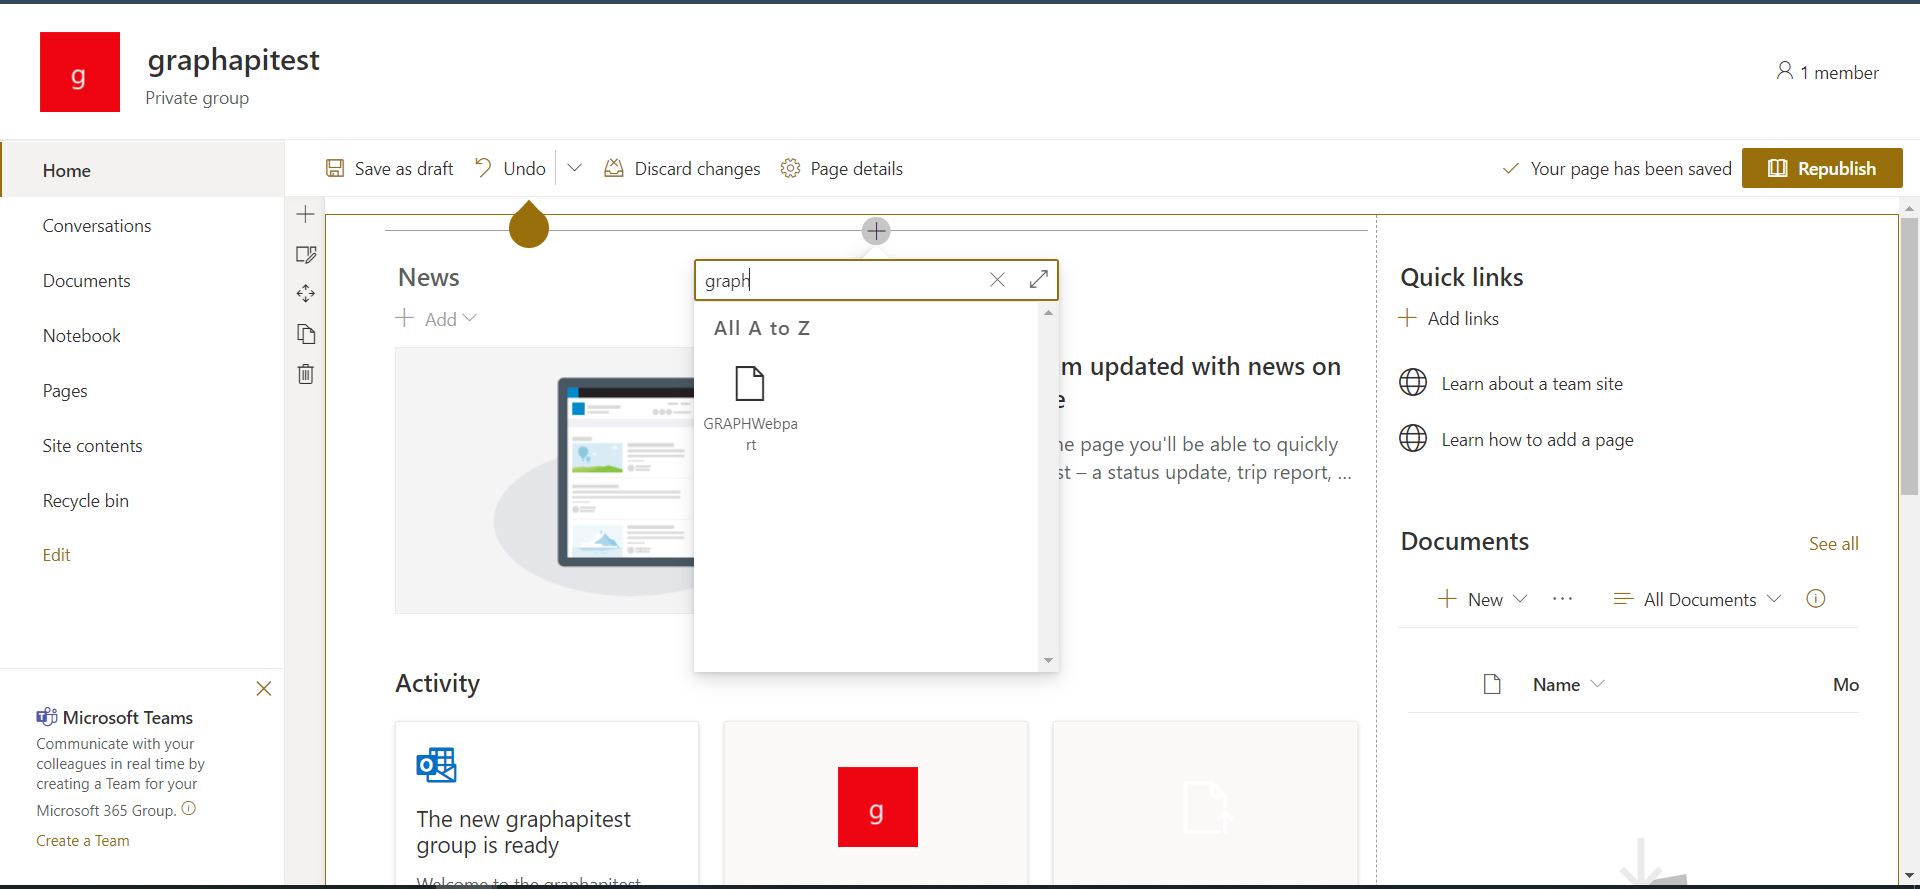
Now our service is now complete, we will be using it in a button in our webpart. Kindly open GraphWebpart.tsx (“src\webparts\graphWebpart\components\GraphWebpart.tsx”) and add the following:
import * as React from 'react';import styles from './GraphWebpart.module.scss';import { IGraphWebpartProps } from './IGraphWebpartProps';import { escape } from '@microsoft/sp-lodash-subset';import { AccessGraphApi } from "../services/GraphApi"export default class GraphWebpart extends React.Component<IGraphWebpartProps, {}> {public render(): React.ReactElement<IGraphWebpartProps> {return (<div className={styles.graphWebpart}><div className={styles.container}><div className={styles.row}><div className={styles.column}><span className={styles.title}>Welcome to SharePoint!</span><p className={styles.subTitle}>Customize SharePoint experiences using Web Parts.</p><p className={styles.description}>{escape(this.props.description)}</p><a href="https://aka.ms/spfx" className={styles.button}><span className={styles.label}>Learn more</span></a><div className={`ms-Grid-row ms-fontColor-white ${styles.row}`}><div className="ms-Grid-col ms-u-lg10 ms-u-xl8 ms-u-xlPush2 ms-u-lgPush1"><ahref="#"className={`${styles.button}`}onClick={() => AccessGraphApi(this.props.context)}><span className={styles.label}>Contact Graph Api</span></a></div></div></div></div></div></div>);}}
We also need to declare in our package-solution.json(“config\package-solution.json”) the scope that we need for this webpart to access Graph API
{"$schema": "https://developer.microsoft.com/json-schemas/spfx-build/package-solution.schema.json","solution": {"name": "graphapibasic-client-side-solution","id": "61182822-76b1-406f-9e1a-1ea7d64401ec","version": "1.0.0.1","includeClientSideAssets": true,"isDomainIsolated": true,"developer": {"name": "","websiteUrl": "","privacyUrl": "","termsOfUseUrl": "","mpnId": ""},"webApiPermissionRequests": [{"resource": "Microsoft Graph","scope": "Mail.Read"}]},"paths": {"zippedPackage": "solution/graphapibasic.sppkg"}}
gulp bundle --shipgulp package-solution --ship
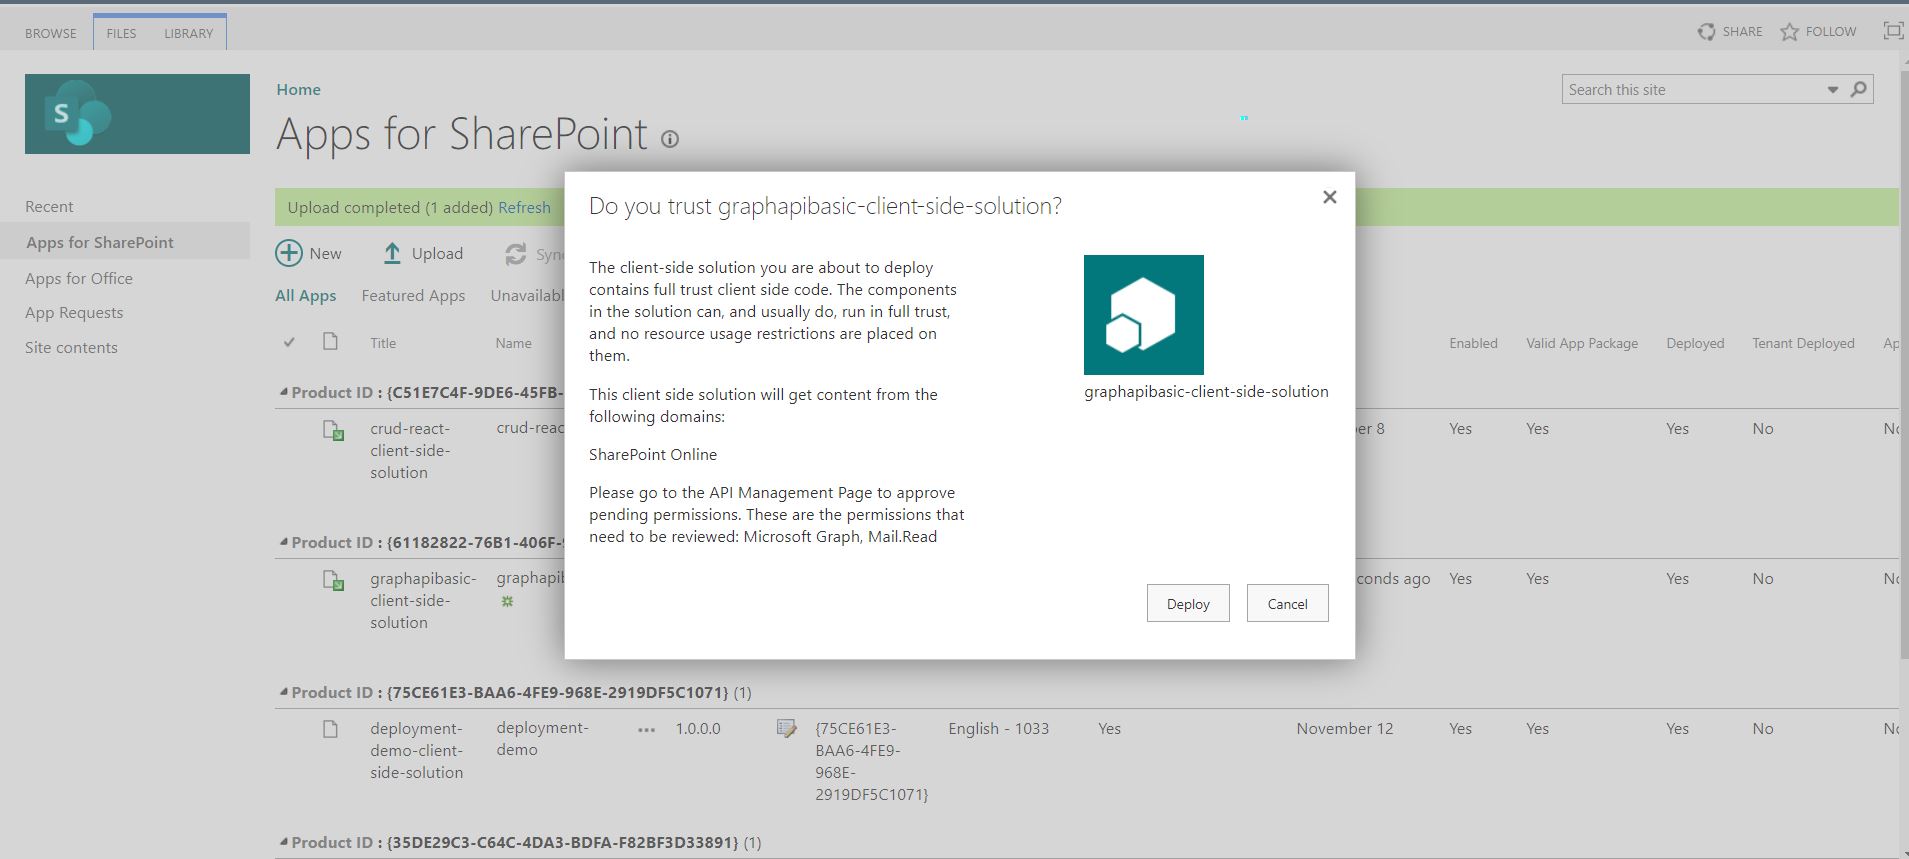
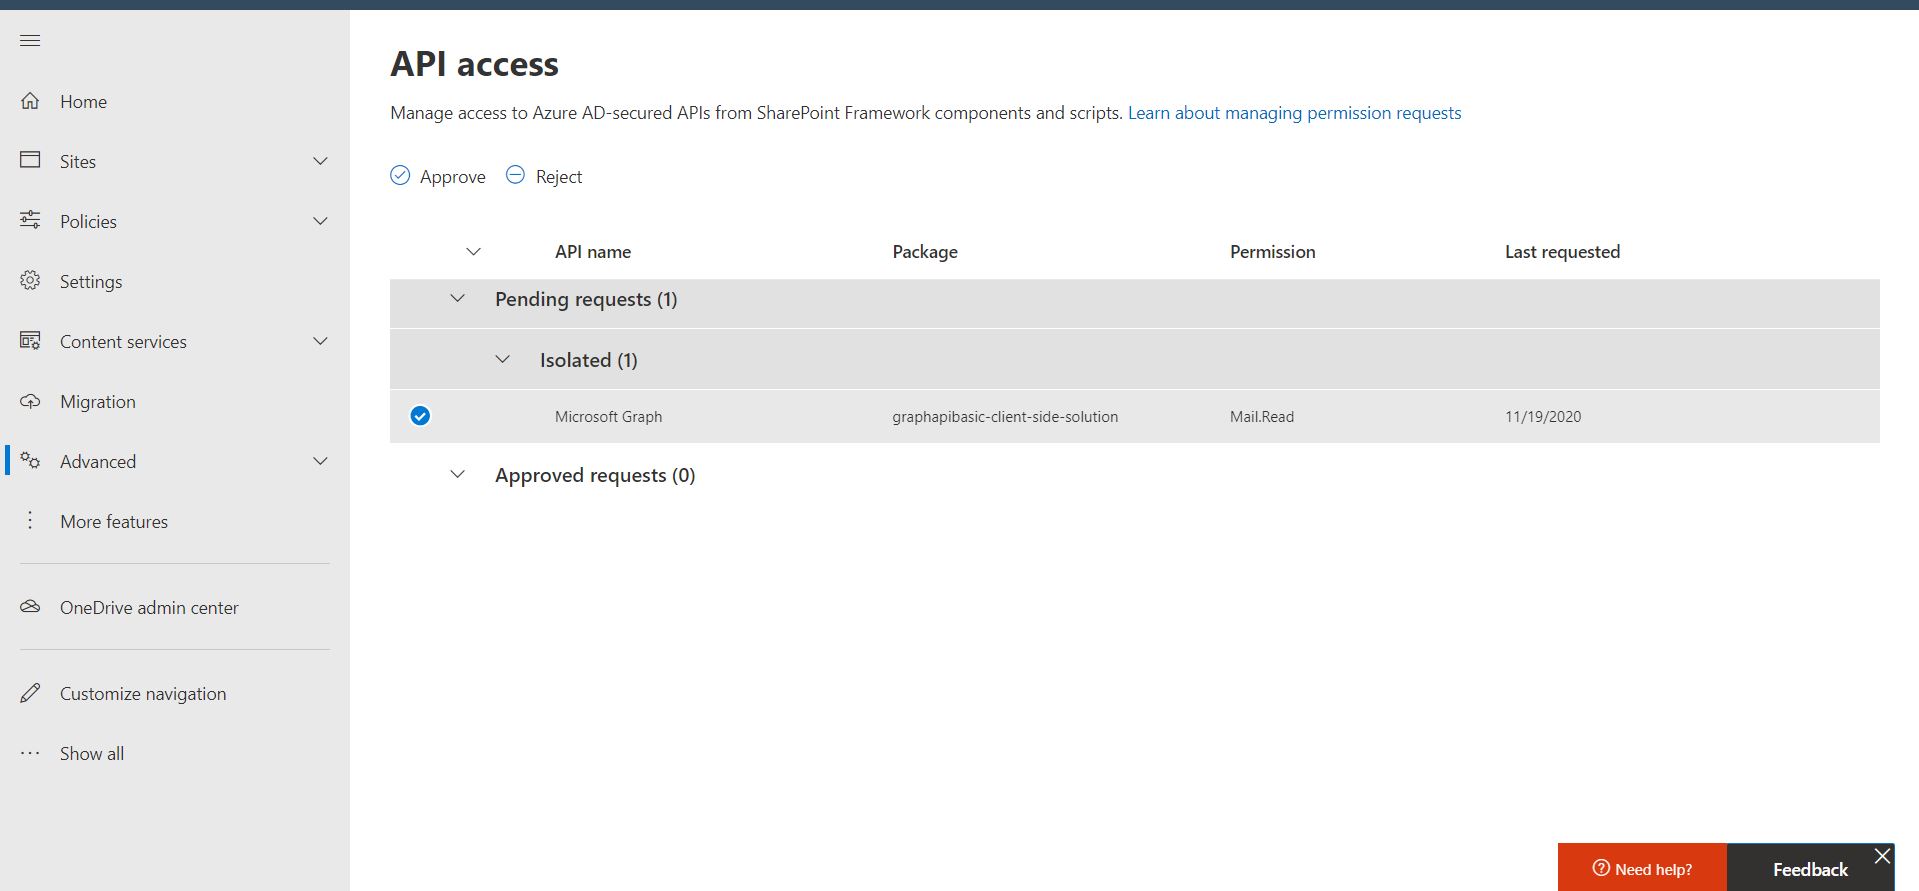
https://[Tenant Url]-admin.sharepoint.com/_layouts/15/online/AdminHome.aspx#/webApiPermissionManagement